This guide will instruct how to add a LoRaWAN device into Easy LoRaWAN Cloud.
- The tutorial will be applicable to all LoRaWAN nodes
- LoRaWAN Server: https://lorawan.easylorawan.com
- Supported frequency plans: here
- Codec for LoRaWAN nodes: here
1. Device profile
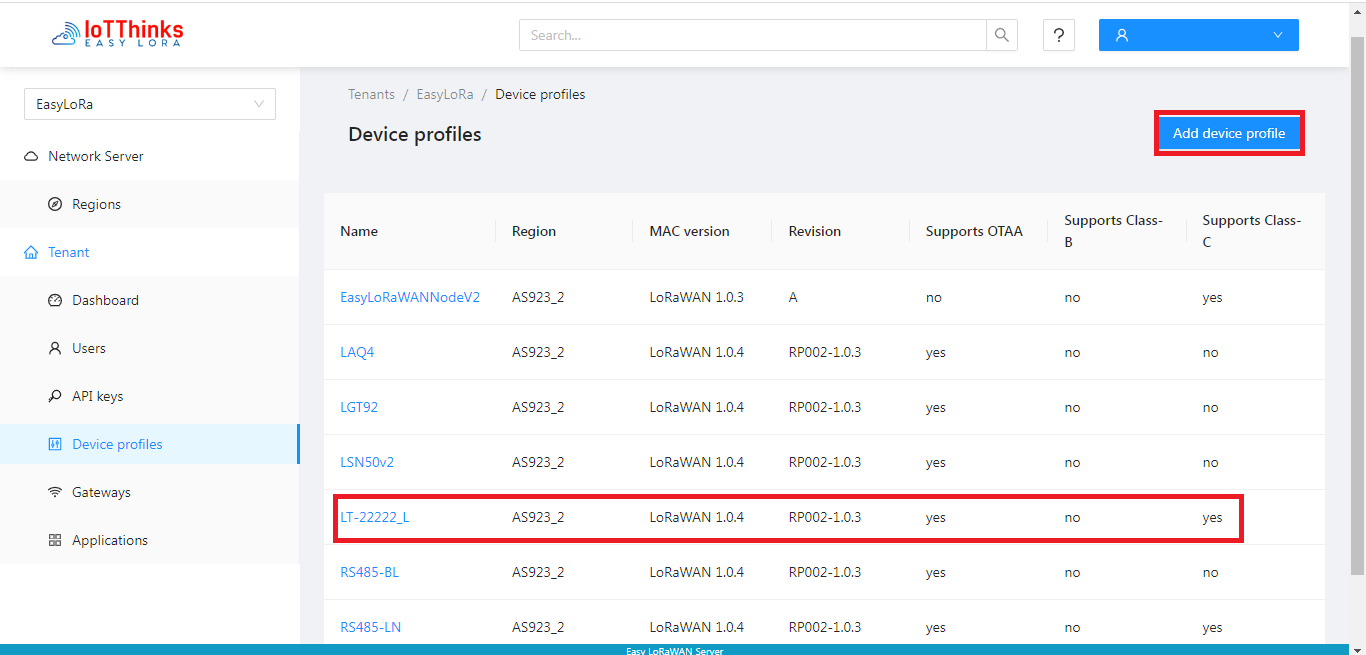
Step 1.1: To go to LoRaWAN Server and create a Device-profile for each LoRaWAN device type
- LoRaWAN devices with the same type will need only one Device-profile.
- LoRaWAN MAC Verion 1.0.4 and LoRaWAN Regional Parameters RP002-1.0.3 are recommended.
- Class A is for LoRaWAN nodes with battery. Class C is for LoRaWAN nodes with main power. Class B is seldom used.
- Codec is generally provided by LoRaWAN manufacturers. You may find them in this codec repository.
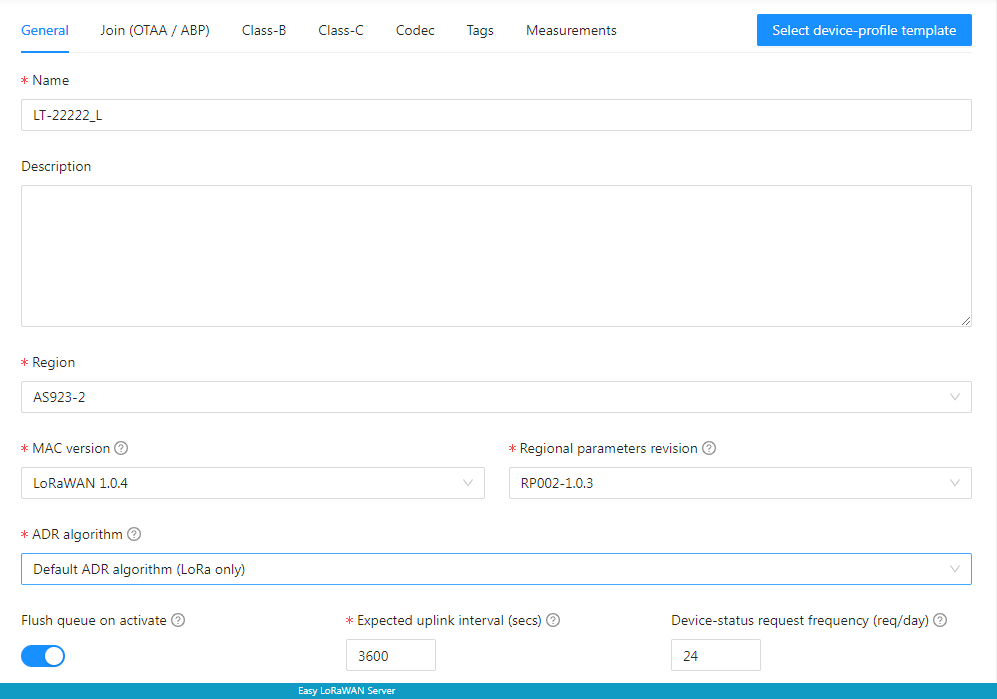
Step 1.2: To set General settings
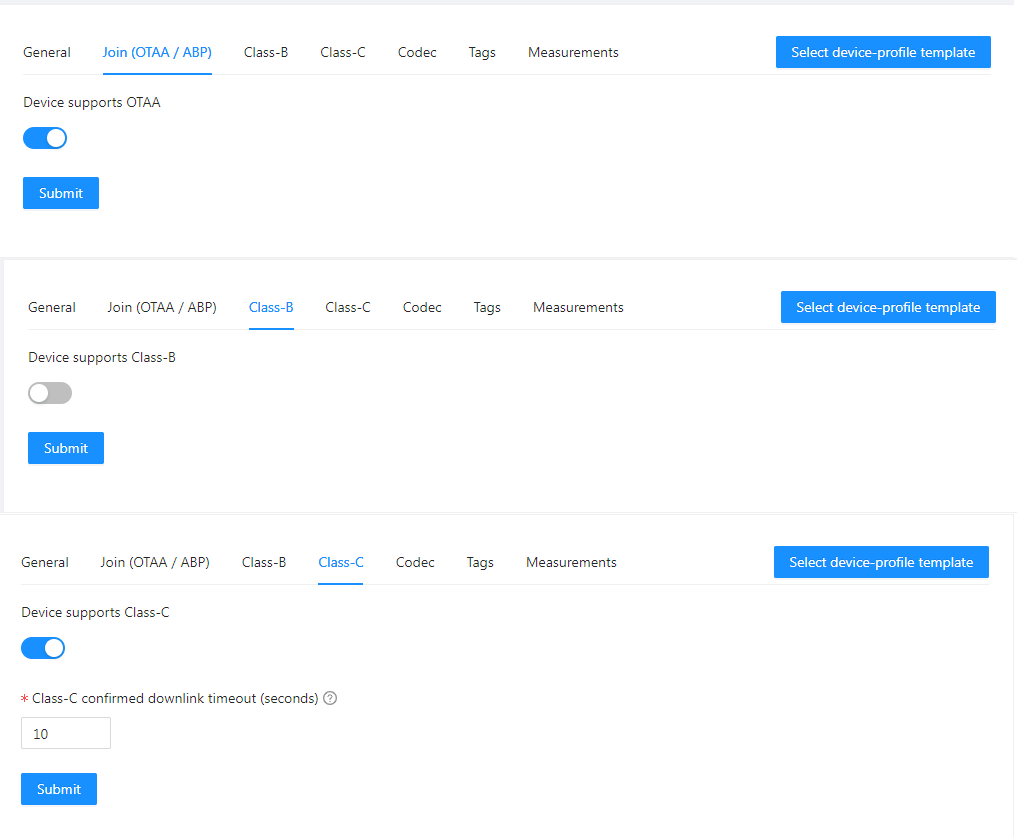
Step 1.3: To set Class A for LoRaWAN devices with battery and Class C for LoRaWAN devices with main power.
- For 8-channel gateway, check “”Device support OTAA”. Usually, OTAA is used.
- For single channel gateway, uncheck “Device support OTAA”.
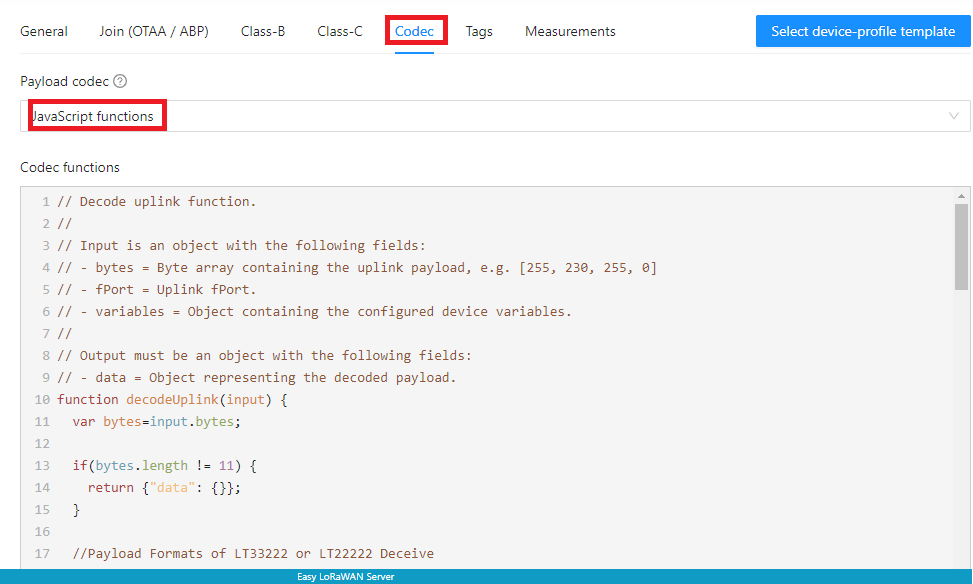
Step 1.4: Codec is used to encode/decode sensor uplinks and command downlinks.
- You may find them in this codec repository.
- Or from the vendor of your node.
2. Application
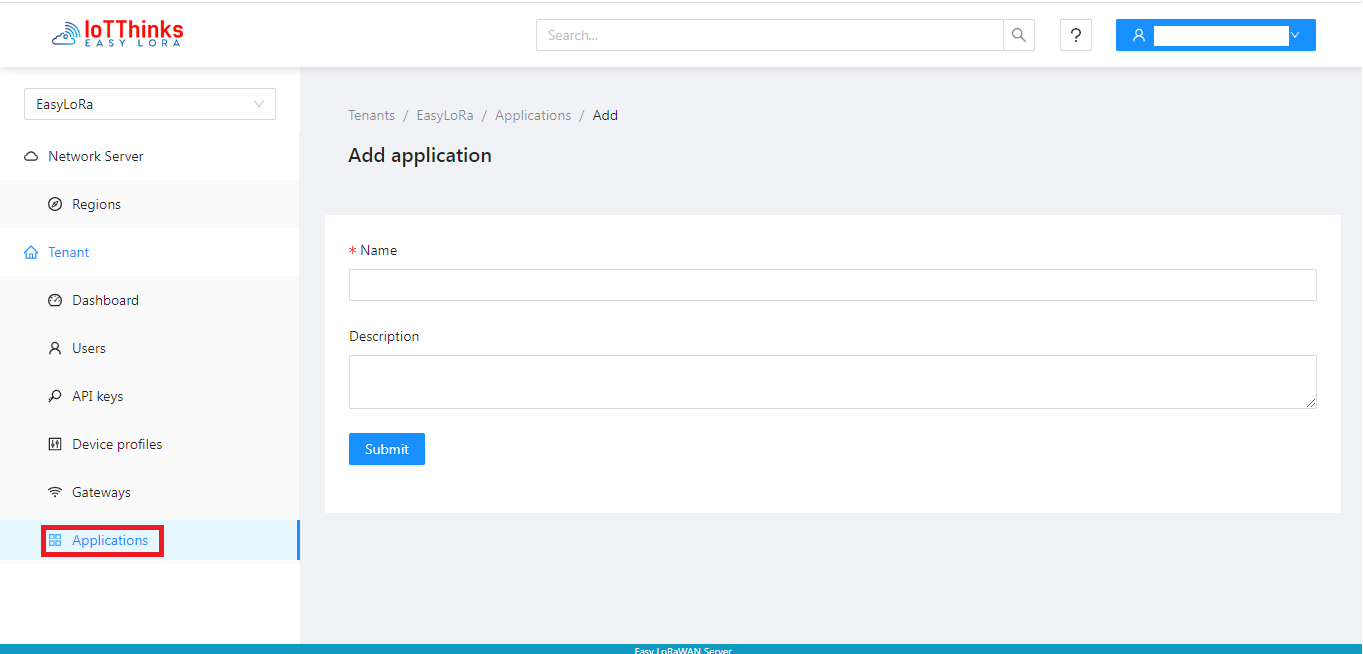
Step 2.1: To create an Application
One application can have multiple LoRaWAN Devices from different device-profiles.
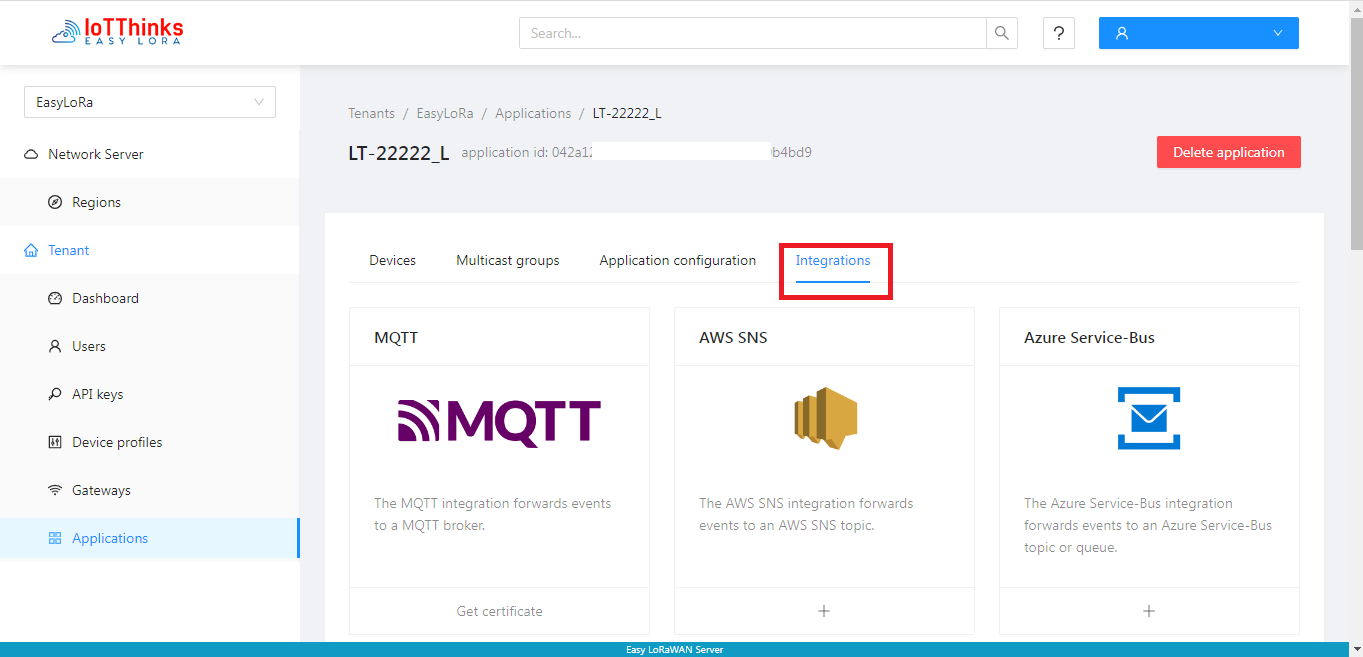
Step 2.2: You can skip this step, Easy LoRaWAN Cloud will automatically do the integration for you.
- You can add the extra Integration only if you want to link to external systems outside Easy LoRaWAN Cloud.
3. Device
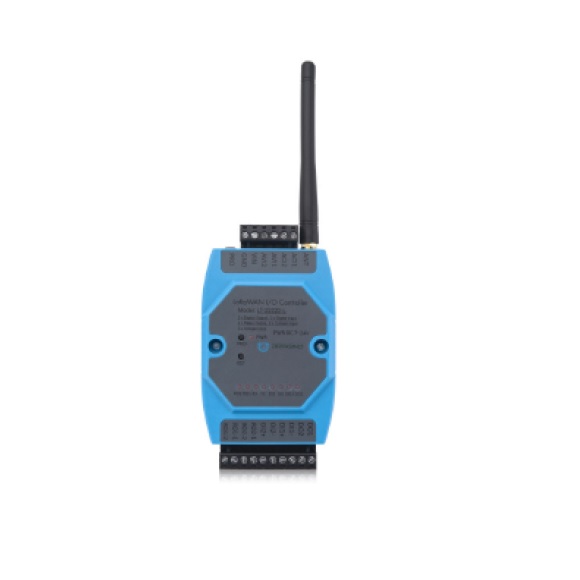
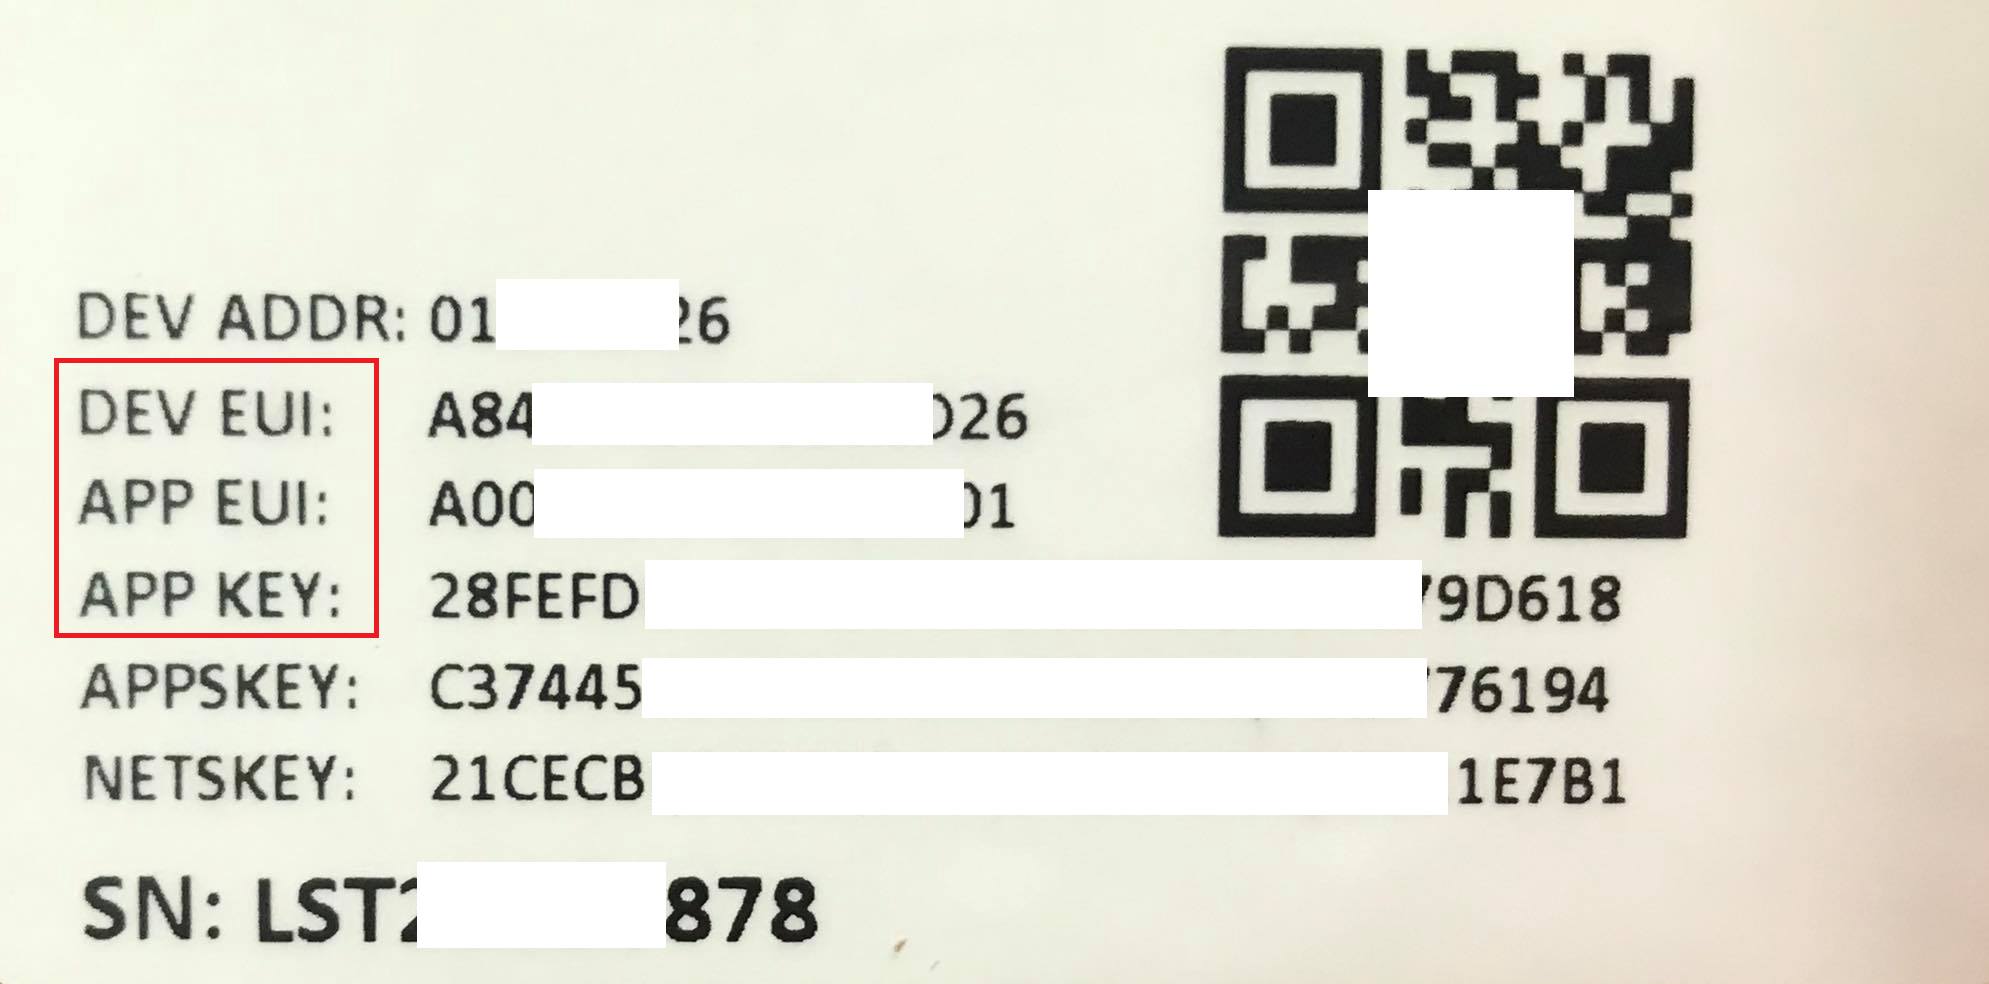
Step 3.1: To get device information. The device information is generally printed in the device box.
- For OTAA, to get Device EUI, App Key and Net Key. This is usually in use.
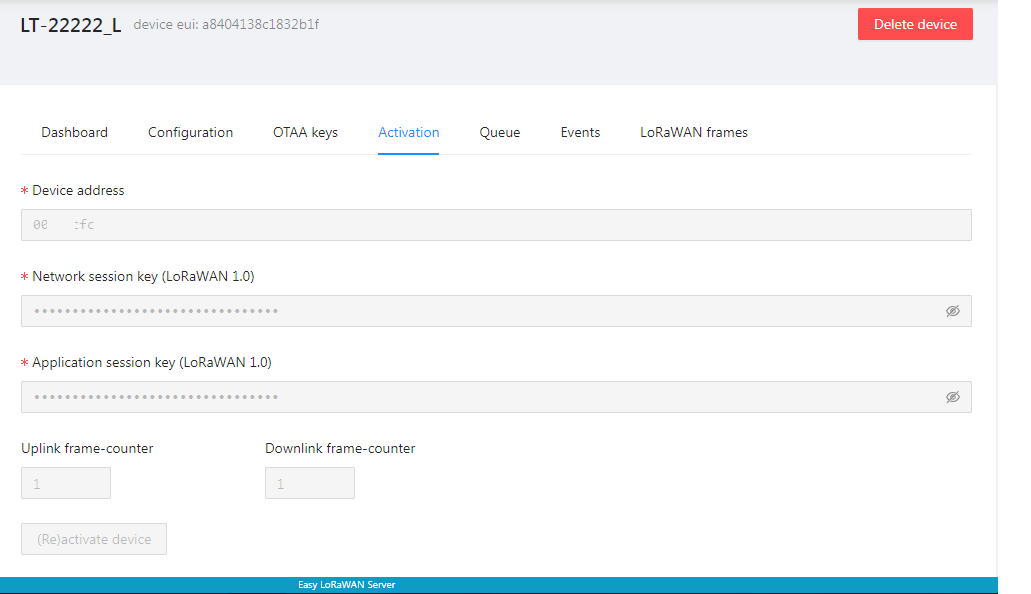
- For ABP (non-OTAA), to get Device EUI, AppSKey and NetSKey.
Step 3.2: To add a Device into Application
- We need to select the appropriate Device-profile for the device in Step 2.1.
- We check “Disable frame-counter validation” during testing phase.
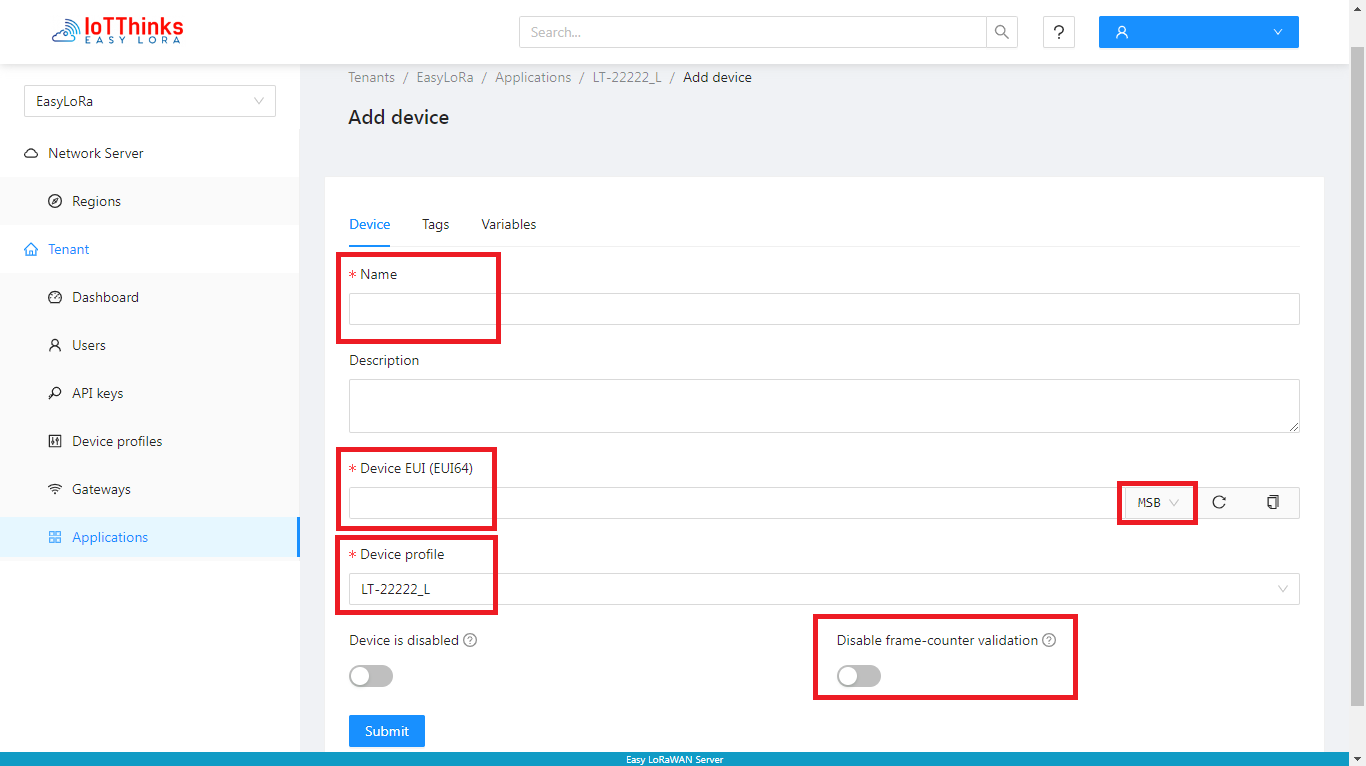
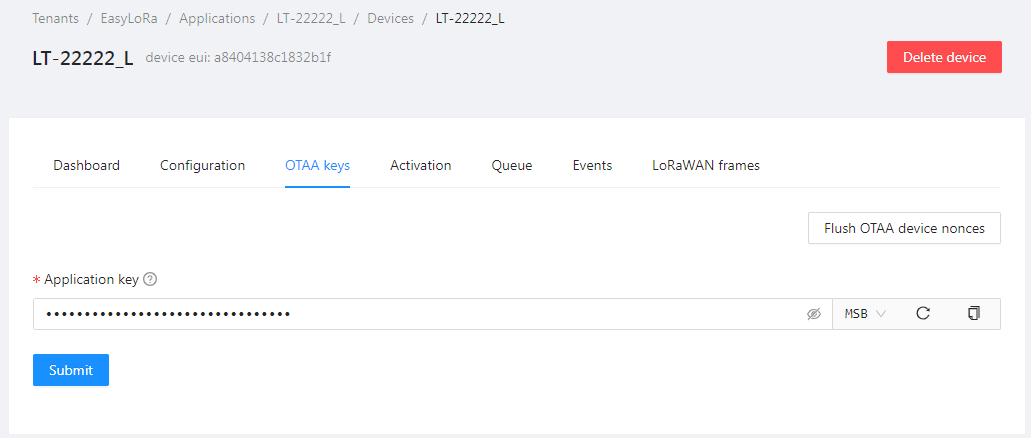
Step 3.3: Application key is App Key from Step 4.1.
- Most of the time, MSB is used.
Step 3.4: If the device uses OTAA, the bellow fields are automatically generated when the device joins the cloud successfully.
Step 3.5: If there is traffic in LoRaWAN Frames, the device uploads successfully to the cloud via the gateway.
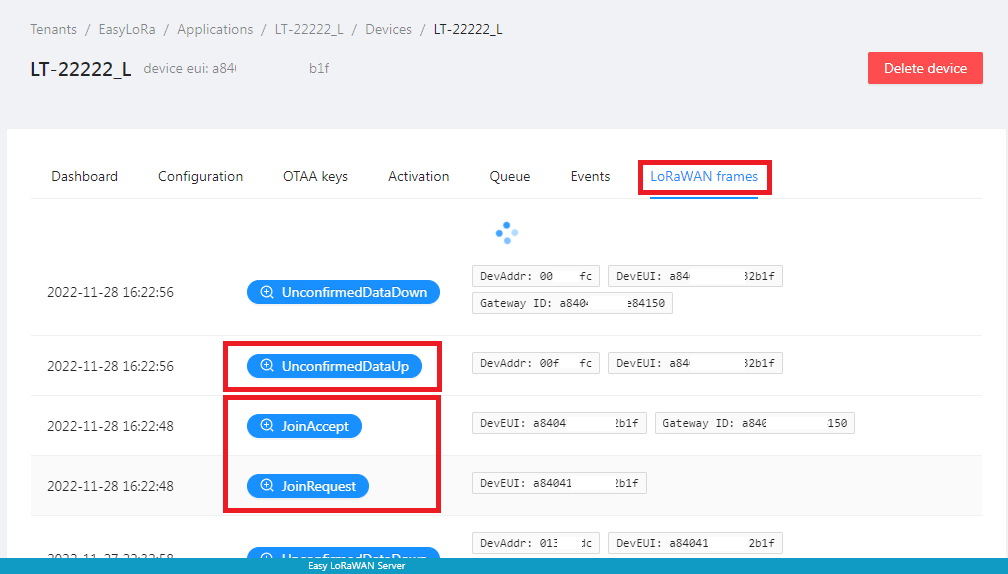
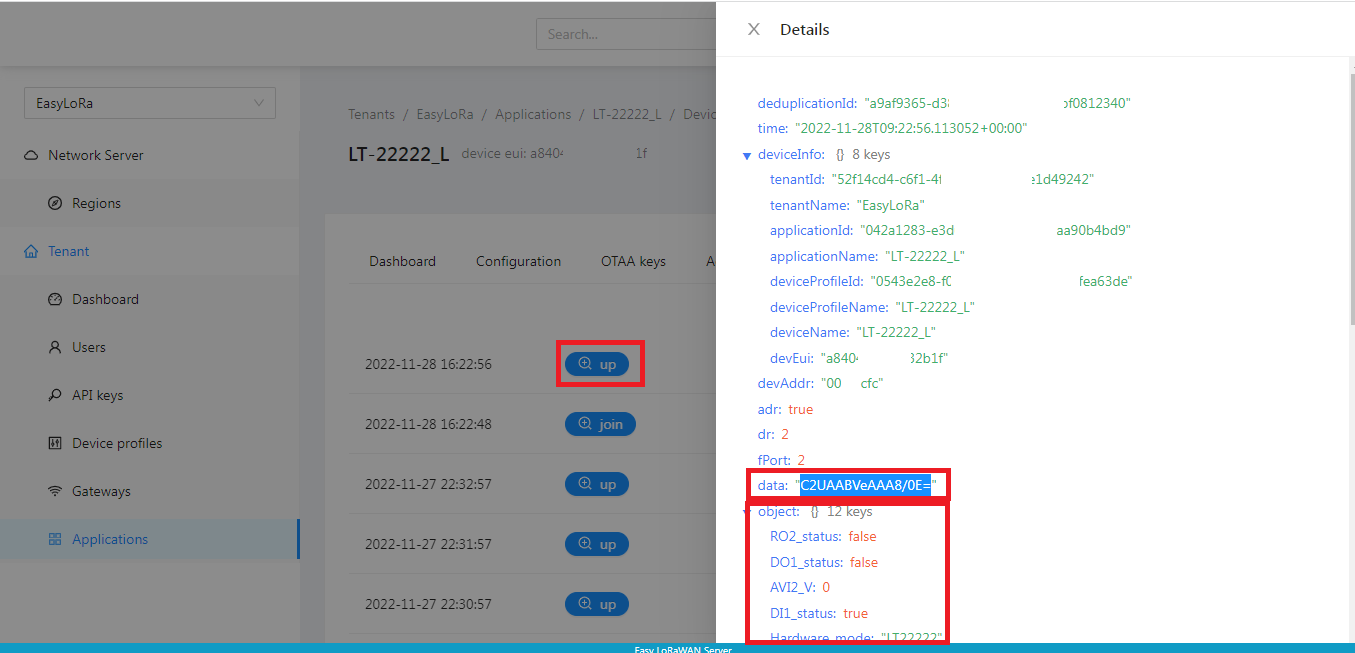
Step 3.6: You can go to Events, check for up packet and look for data field.
- The data value is in base64. You can decode the data value to hex at https://codebeautify.org/base64-to-hex-converter
- If the codec is working, you will see human-readable object.
Done.
Need help for your projects?
Please chat with us on the red chatbox to get help or discuss about your projects.
Thanks for reaching us.


Hi,
How about other LoRaWAN devices in the market?
Best regards.
Hi James,
The guide is applicable for all LoRaWAN devices.
The only difference is at Step 1.4: You need to get the codec from the LoRaWAN vendors or you can create the codec on your own.
This is the guide to get common and well-known codecs and/or create your own codec.
https://iotthinks.com/create-a-codec-for-lorawan-nodes/
Hope it helps.