This guide will help to do initial setup to a Dragino LoRaWAN gateway: Management Web GUI and Network connectivity.
- LoRaWAN Server for gateways: lorawanserver.easylorawan.com
- LoRaWAN Server: https://lorawan.easylorawan.com
- Supported frequency plans: https://iotthinks.com/frequency-plans-in-easy-lorawan-cloud
General Information

Dragino DLOS8N-EC25 (4G)
- 8-Channel OUTDOOR LoRaWAN gateway
- Supports WiFi, Ethernet, 4G and GPS
- IP65 and Lighting Protection
- Datasheet: https://bit.ly/Dragino-DLOS8N
- User Manual: Online version
- Document base: From Dragino
Dragino LPS8v2
- Indoor 8-channel LoRaWAN gateway
- Supports WiFi, Ethernet and 4G (Optional)
- Datasheet: https://bit.ly/Dragino-LPS8v2
- User Manual: Online version
- Document base: From Dragino
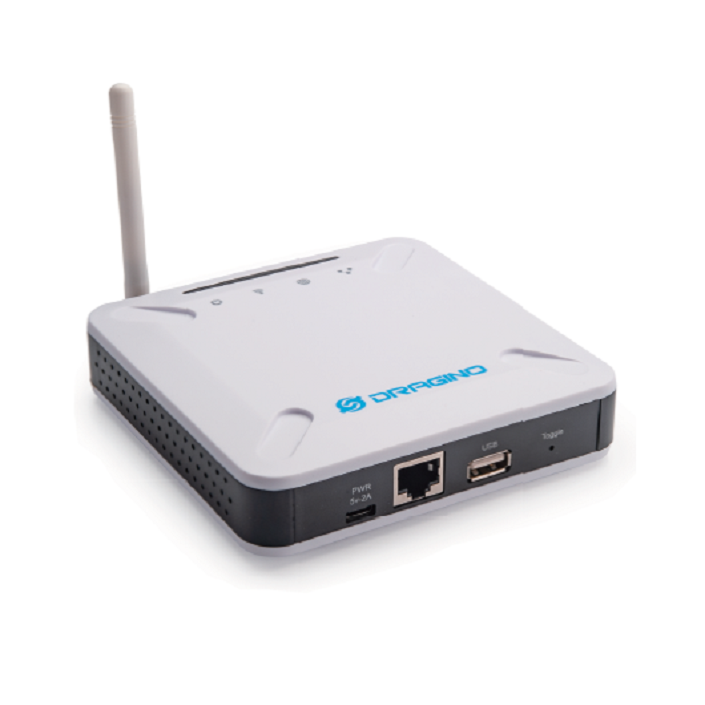
A. Hardware Assembling
The gateway is assembled in the following steps:
- To attach the provided antenna to the gateway. The gateway MUST be attached to the antenna before power on.
- To attach the USB power adapter to the gateway
- To attach the USB power adapter to main power
B. Setup gateway for the first time
- If the WiFi of your laptop/PC is NOT in use, to follow “Setup via Gateway WiFi”.
- Else if the LAN port of your laptop/PC is NOT in use, to follow “Setup via Gateway LAN port”.
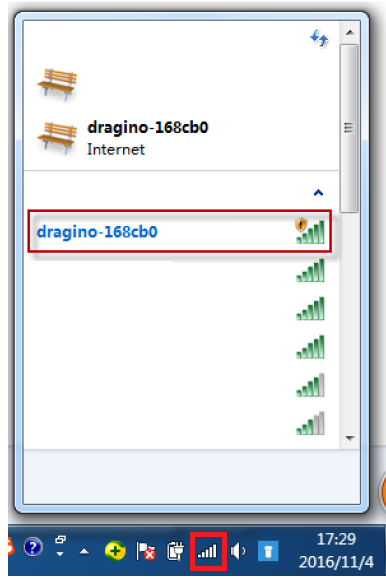
Step 1: To connect via Internal WiFi of the gateway
- To find a WiFi name dragino-xxxxxx of your gateway and connect to it.
- Password: dragino+dragino
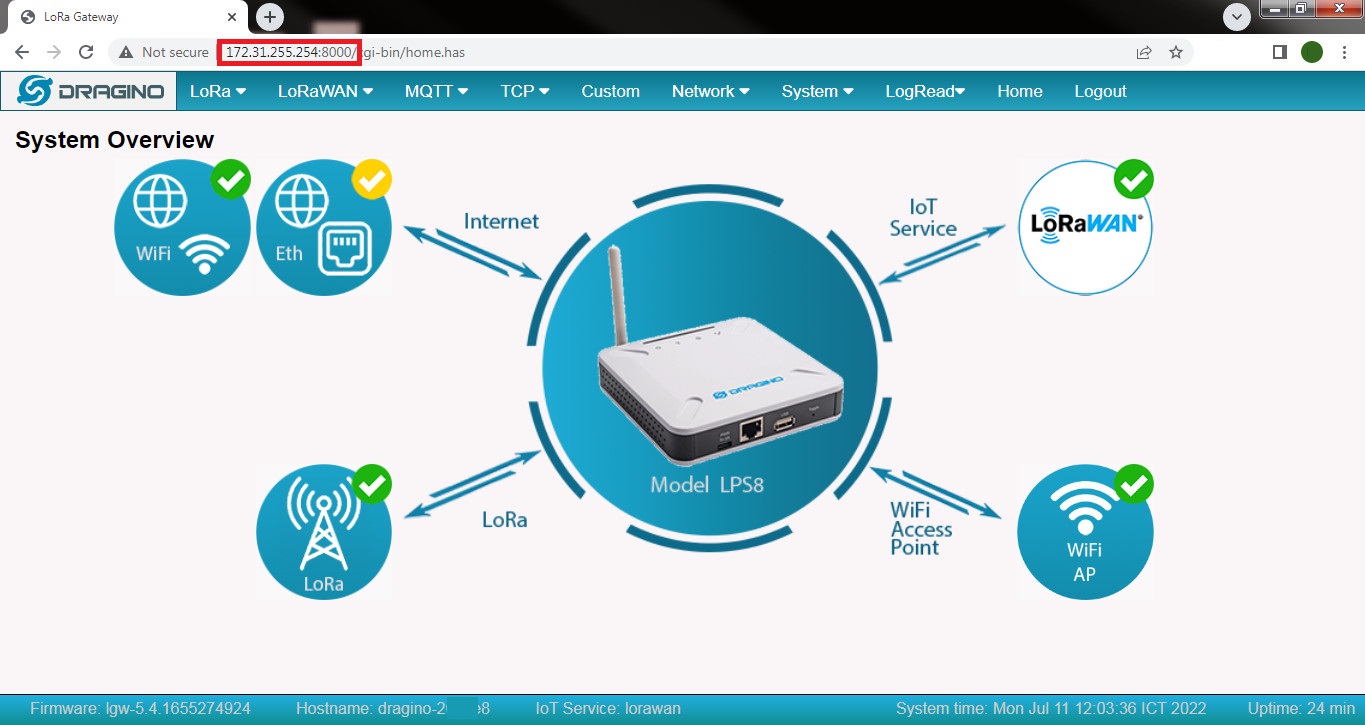
Step 2: To connect to Web management of the gateway
- URL: http://10.130.1.1 (Internal WiFi IP)
- SSH: 10.130.1.1 port 2222
- Username: root
- Password: dragino

C. Connect gateway to production network
These steps are to deploy the gateway into production network for long term usage.
- You may want to use Advanced IP Scanner to check the IP of your gateway.
- If the gateway can connect to both LAN and WiFi, LAN connection will be in use and WiFi will be on standby.
If you have a WiFi access point near the gateway, you can connect the gateway to the WiFi access point.
Step 1: To click Network > WiFi then enter the WiFi name and password of the WiFi access point. And click Save&Apply.
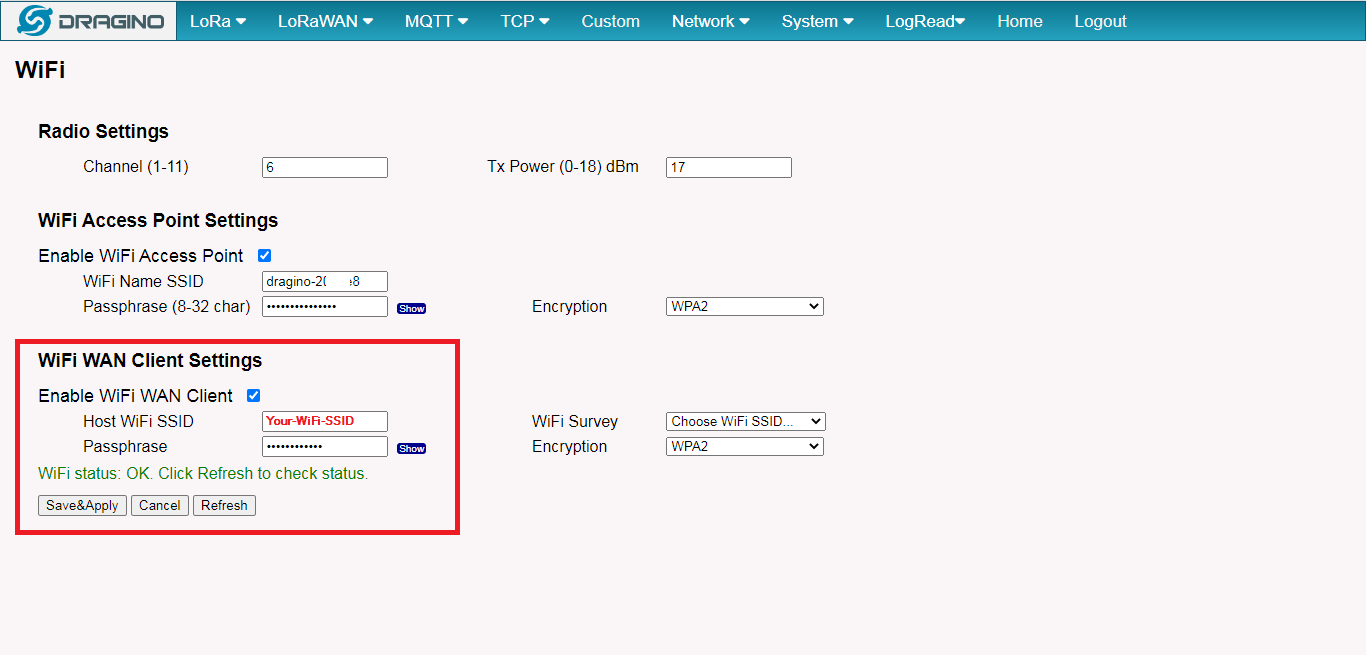
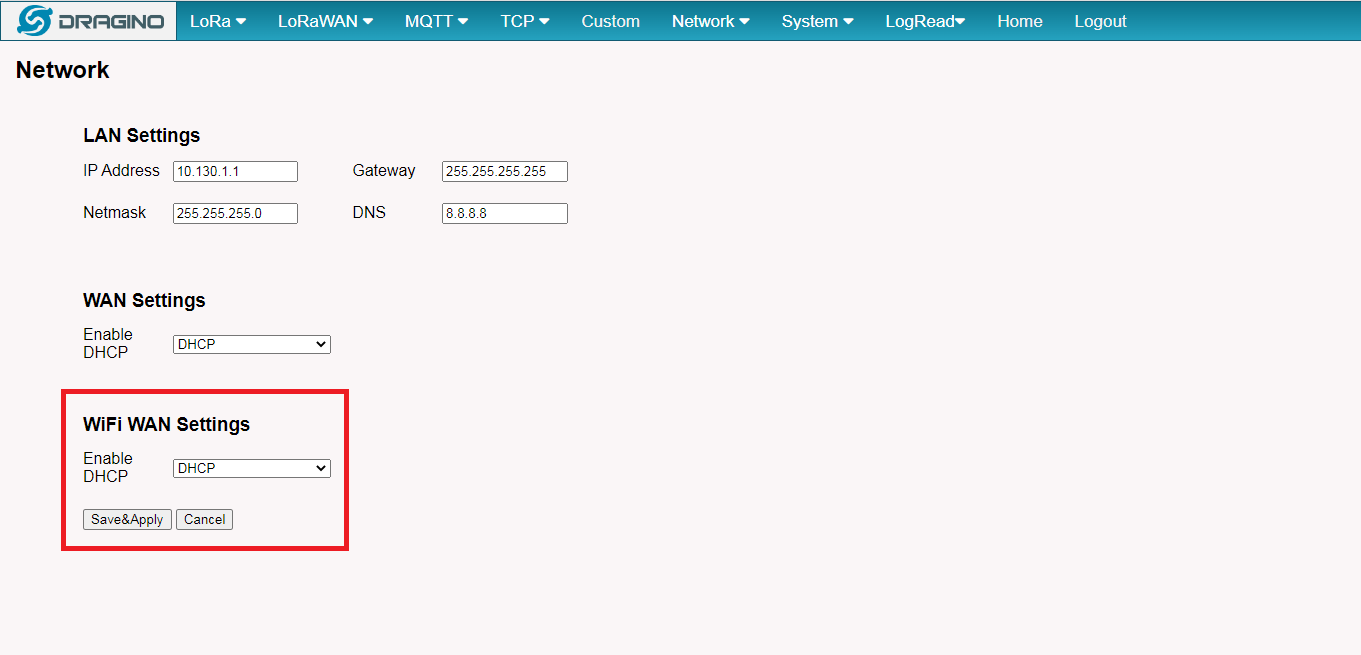
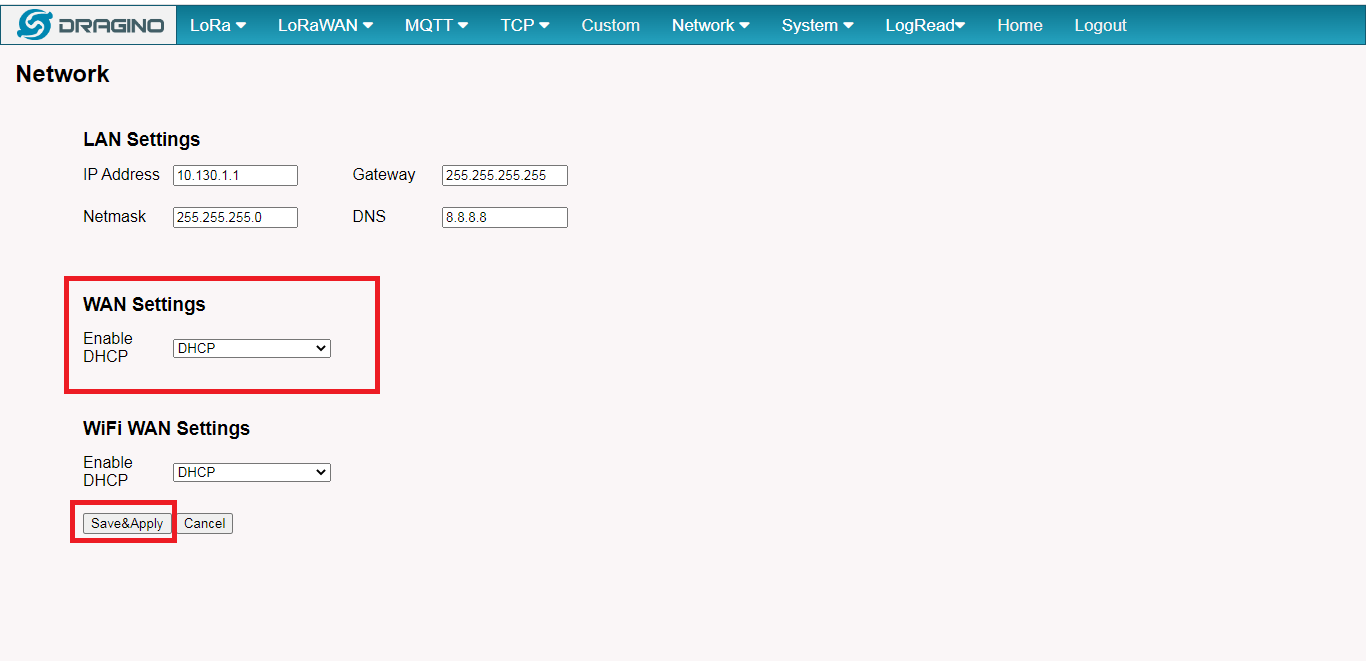
Step 2 (Optional): Click Network > Network, you can leave it as DHCP or set a Static IP for the WiFi.
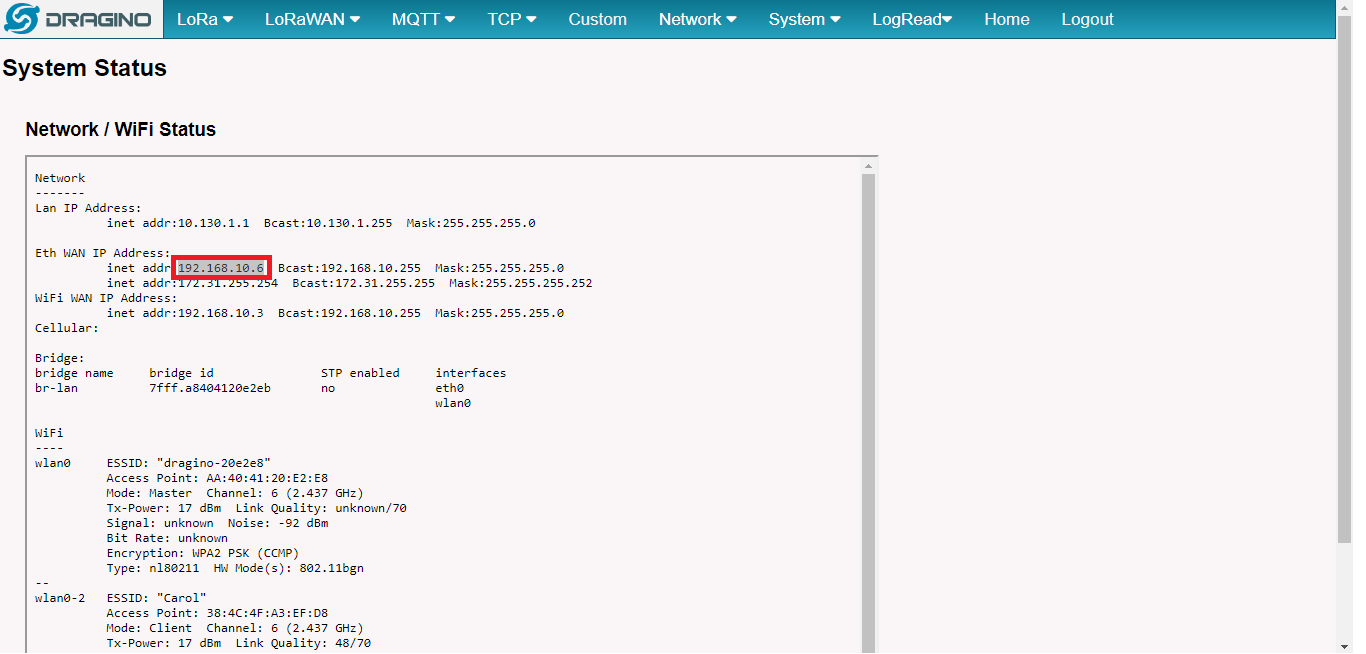
Step 3: You can find the WiFi IP in Network > Network Status
- You can now access the gateway via http://WiFi-IP:8000 (or http://WiFi-IP) and SSH to port 2222

D. Configure LoRaWAN Settings
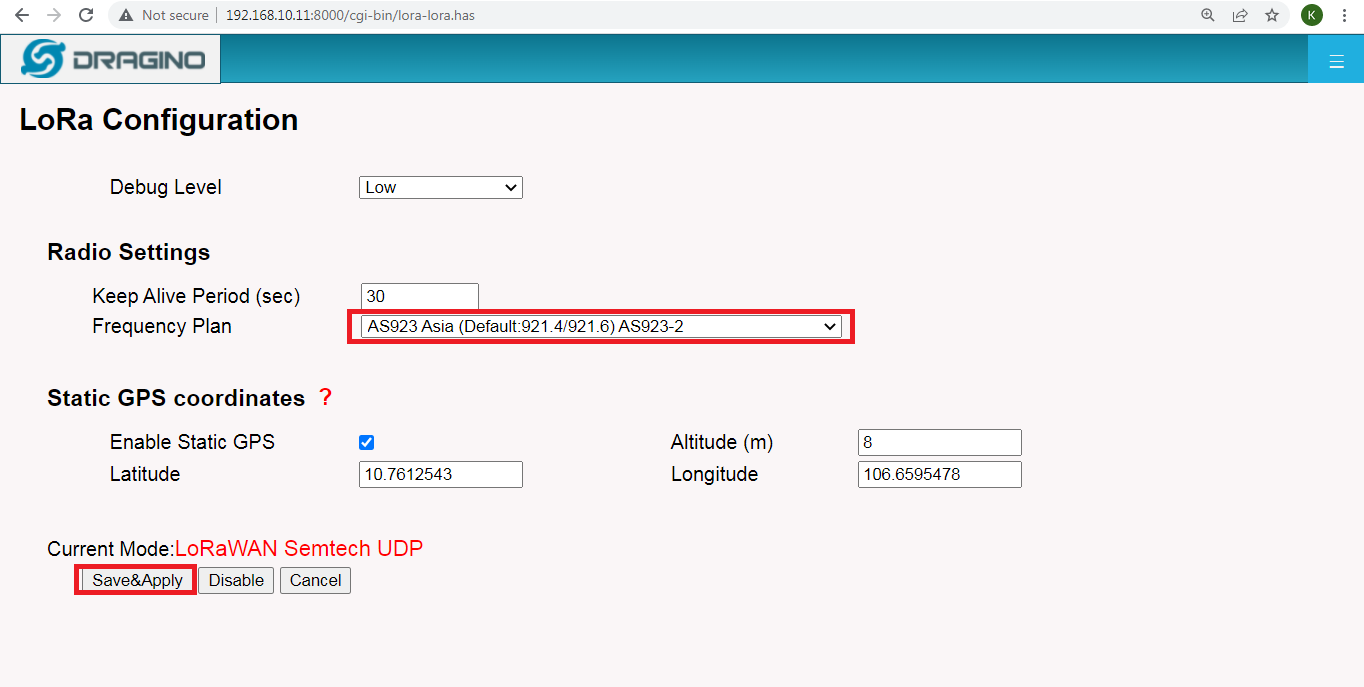
Step 1: To set the gateway to use your frequency plan. To click “Save & Apply”.
Step 2: To set the following information to connect to the Easy LoRaWAN Cloud. To click Save&Apply.
- Service Provider: Custom / Private LoRaWAN
- Server Address: Check LoRaWAN Server for gateways at the top of the guide.
- Uplink and Downlink Port: To check here for your frequency plan and ports. Port 1700 for AS923-2 (Vietnam).

Done.
Need help for your projects?
Please chat with us on the red chatbox to get help or discuss about your projects.
Thanks for reaching us.


Will this guide work for Dragino LPS8v2?
Hi Bob,
This guide works for Dragino LPS8, LPS8v2, LPS8N gateways (for indoor) and Dragino DLOS8/DLOS8N (for outdoor).
You may love to try your gateways with us.
OK, I will try them with your LoRa Cloud.
Thanks a lot for helping.
Yes, in our plans, we could help you to debug and on board your gateways with us.
Hope it helps.
https://iotthinks.com/easylorawan-cloud/