This guide will instruct you to use Mikrotik KNOT LR8 and LR9 in Easy LoRaWAN Cloud.
- Product link: Mikrotik KNOT
- Documentation: Mikrotik KNOT

1. Basic Setup
Step 1: To connect to the gateway
- The MikroTik Routerboard exposes a WiFi Access Point (AP) with SSID
MikroTik-xxxxxx, wherexxxxxxare the last 6 digits of the device’s MAC address. - Use your PC, tablet or smartphone to connect to this AP. You will not need a password to connect to this AP.
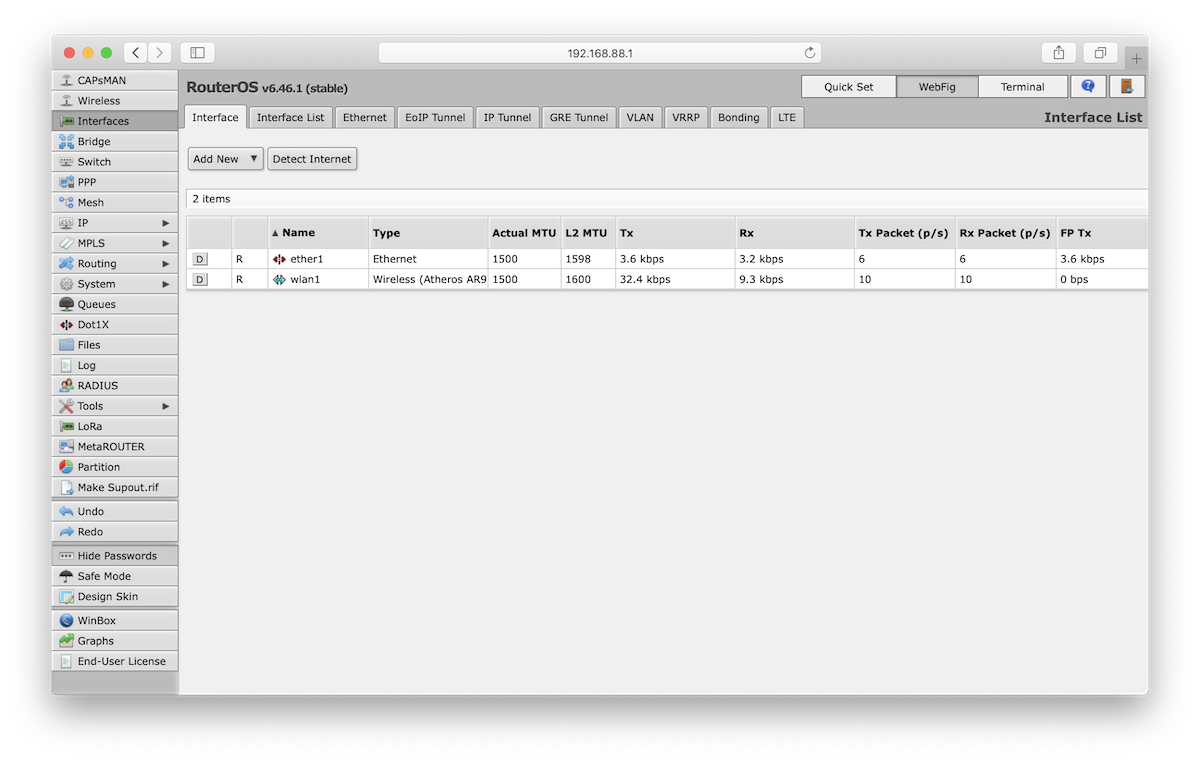
- By opening your browser to
http://192.168.88.1/webfigyou will be able to access the RouterOS web interface and configure your gateway device.
Step 2: To connect the gateway into the network and make sure the gateway can reach the Internet.
Step 3 (Optional): To setup LTE-M for the gateway
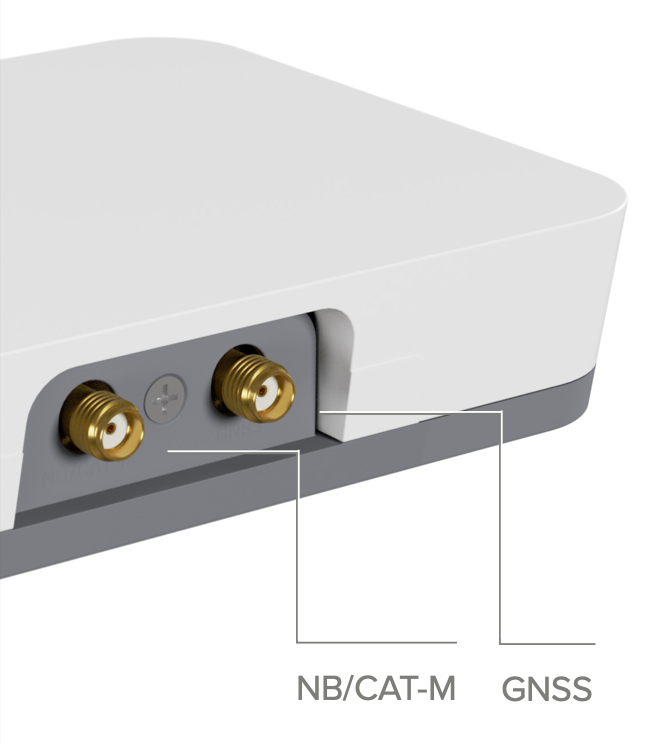
- Connect an external antenna to the LTE-M antenna connector.
- Go to Interfaces, click on PPP-out1 and fill out the APN settings of your operator.
- To test whether a connection with your LTE-M network is established, go to the Terminal tab in the RouterOS web interface and run the command:
/interface ppp-client info ppp-out1I - If the gateway is set up correctly, it will respond with a message like:
modem-status: ready
pin-status: no password required
functionality: full
manufacturer: Quectel
model: BG77
revision: BG77LAR02A04
current-operator: LMT (n/a)
signal-strength: -67 dBm
Need help for your projects?
Please chat with us on the red chatbox to get help or discuss about your projects.
Thanks for reaching us.


2. LoRaWAN Configuration
Step 1: Select LoRa on the left hand menu. The status of the gateway should be Disabled – if needed, press the D button to disable it.
Step 2: From the top menu, select the Servers tab and press the Add New button.
Step 3: From the top menu, select the Devices tab. Click the Gateway ID to configure the gateway.
Next steps:
Done.