This guide will instruct you to use Dragino LSN50v2-S31 in Easy LoRaWAN Cloud.
-
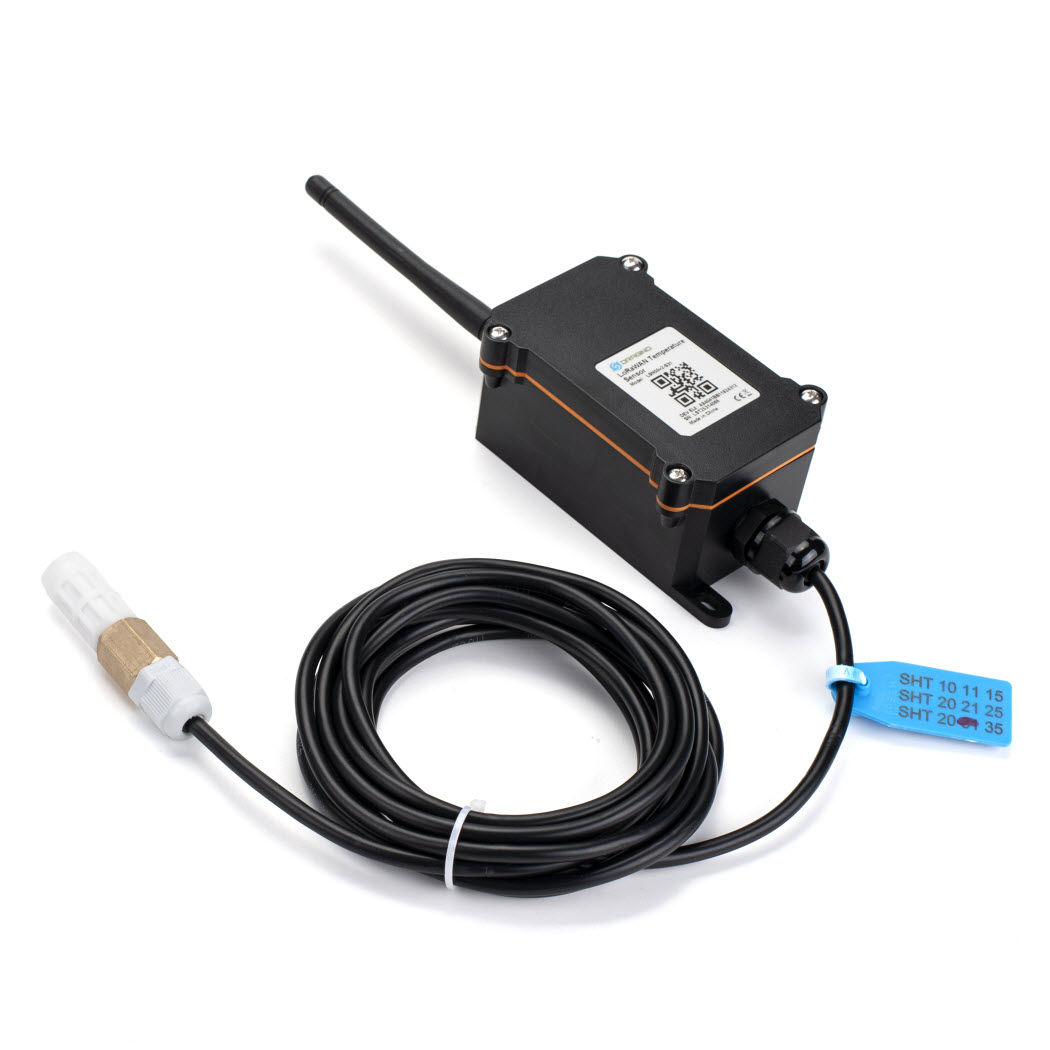
- Product link: Dragino-LSN50v2-S31
- WaterProof Battery Powered (IP68)
- LoRaWAN Class A
- Temperature and humidity sensor: SHT31 with 3m cable
- Non-chargeable 8500 mAh battery
- Antenna connector: RP-SMA
- 1-year warranty (not including battery)
- Datasheet: https://bit.ly/Dragino-LSN50v2-S31
- User Manual: Online version
- Document base: From Dragino
A. Hardware Assembling
The node is assembled in the following steps:
- To attach the provided antenna to the node. The node MUST be attached to the antenna before power on.
- The sensor must be connected to the node by default.
B. Basic Setup
Step 1: To read the full manual at the top of this guide.
Step 2: To attach the antenna to the node
- Attenna MUST be attached before powering on node to avoid damaging the sensitivity of LoRa chip.
Step 3: To turn on the node
- To remove the 04 screws in the case
- To attach the yellow jumper to the 2 pins to connect the battery to turn on the node
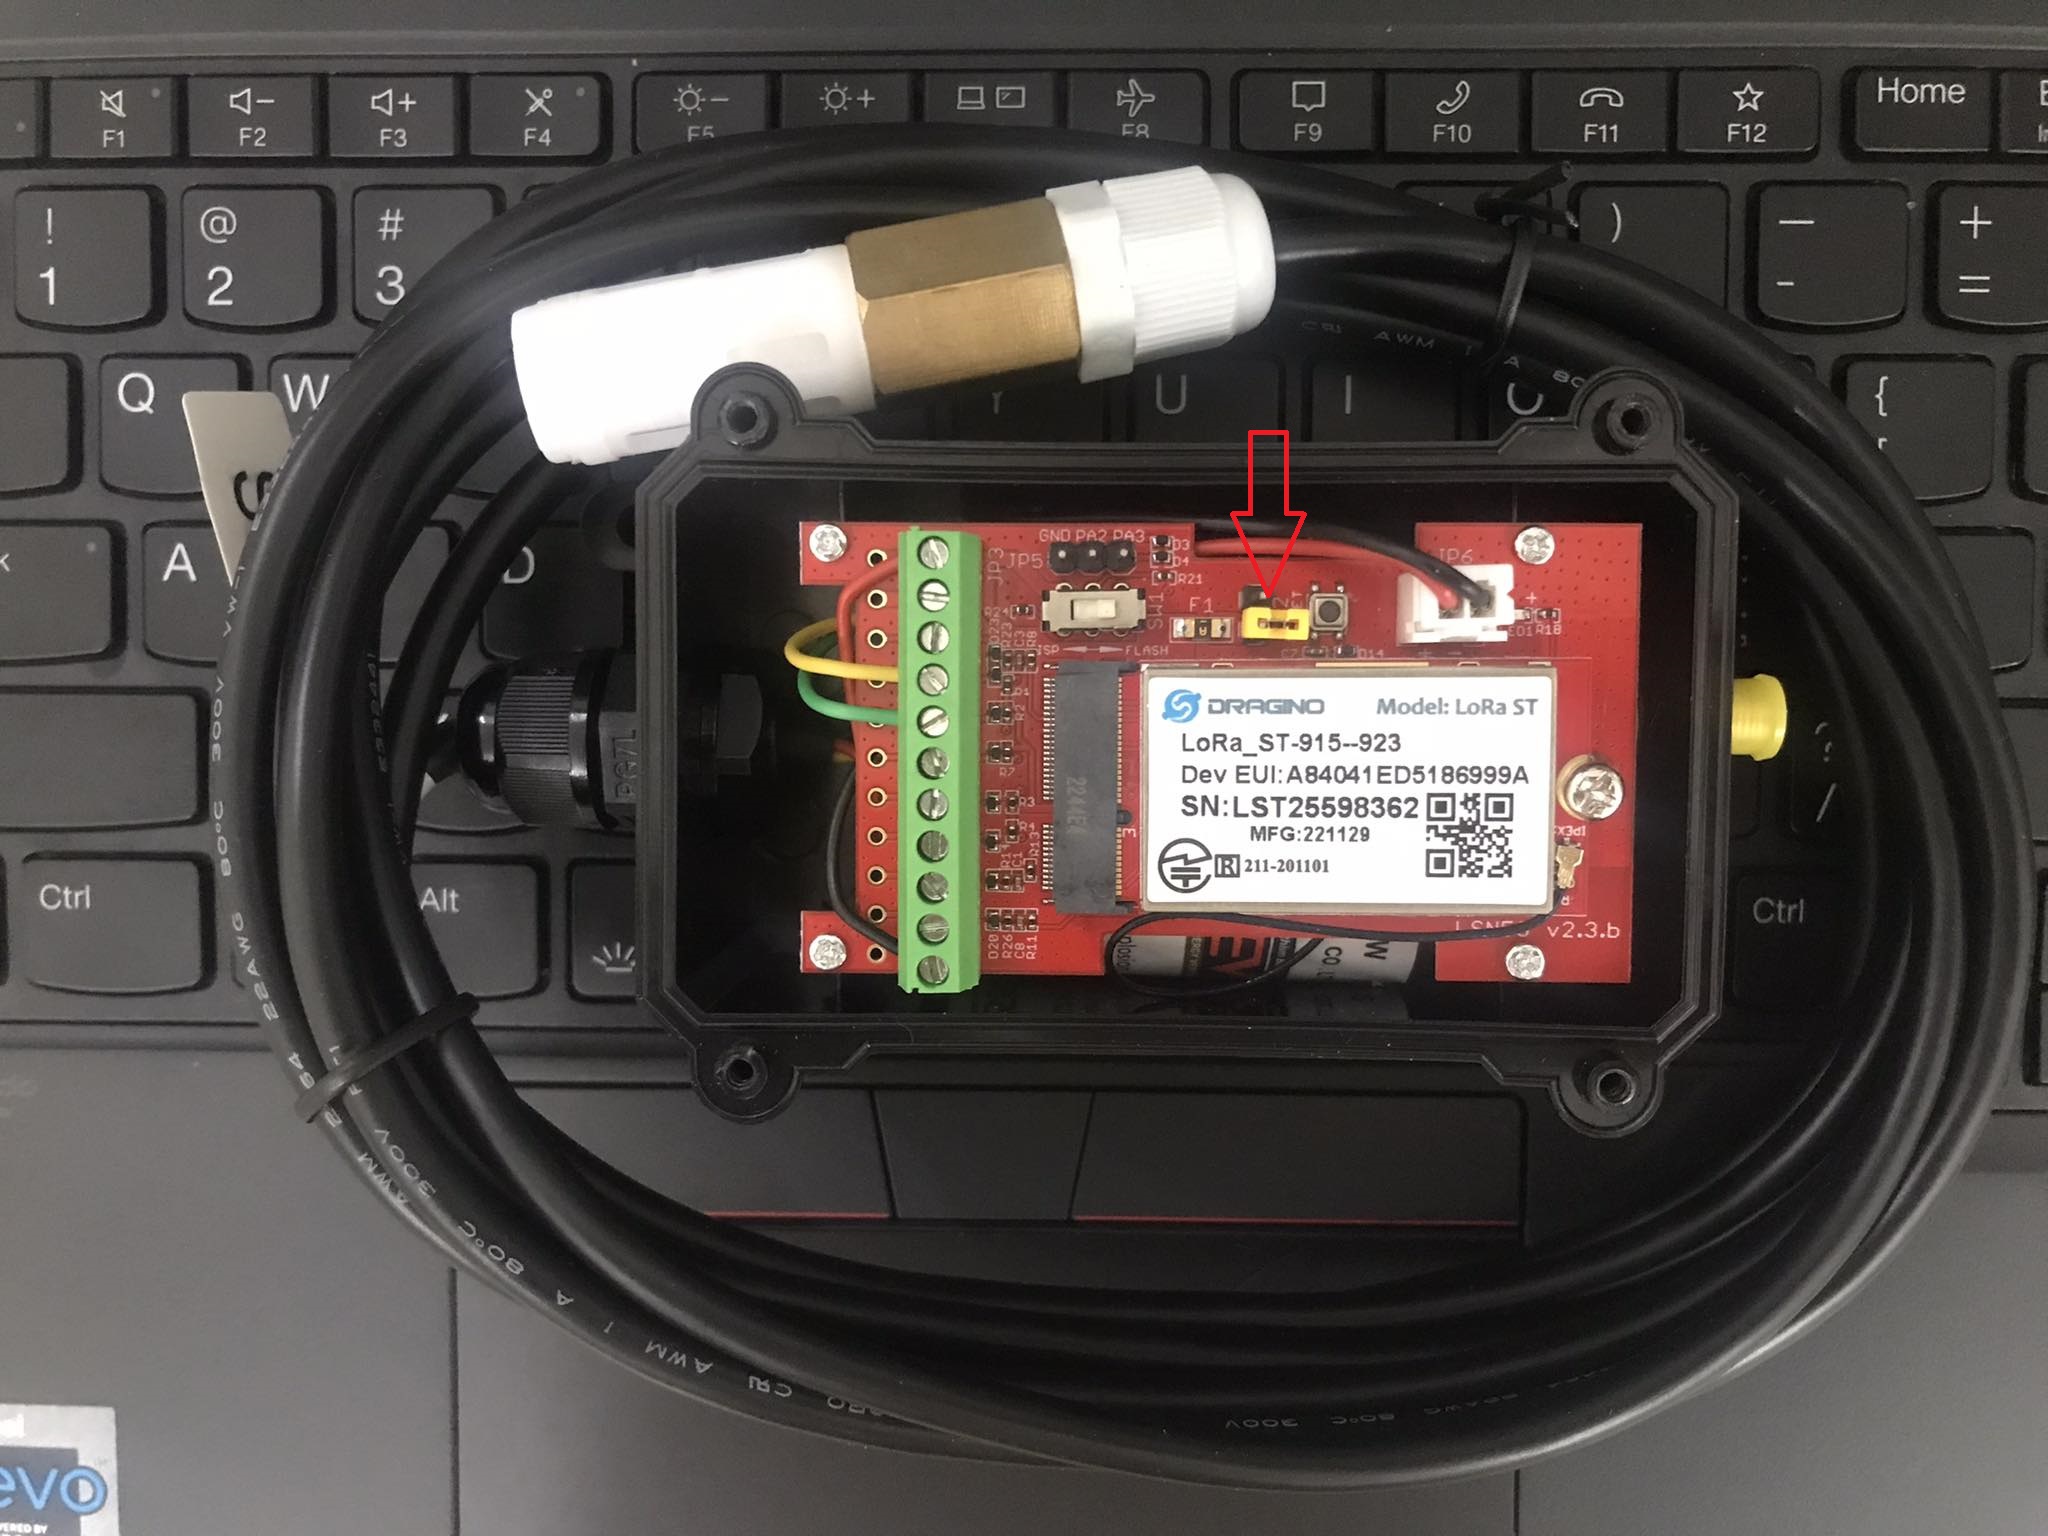
Step 4: To get the keys of the node. We need Dev EUI and App Key for Easy LoRaWAN Cloud later.
- Dev EUI: On the label inside the paper box of the node
- App EUI: On the label inside the paper box of the node
- App Key: On the label inside the paper box of the node
![]()
C. Codec
Codec is used by the LoRaWAN Server in later guide to decode the message to suitable format for human and the Cloud.
Step 1: Uplink payload is mentioned in the Section 2.3 of User Guide.
- The manual is at the top of this guide.
Step 2: To get the codec of the node.
- Codec for Dragino LSN50v2-S31: here
Need help for your projects?
Please chat with us on the red chatbox to get help or discuss about your projects.
Thanks for reaching us.


D. Connect to UART (Optional)
You can connect UART cable to the node to manually configure or upload firmware to the node.
Step 1: To get a USB UART ready
Step 2: To install Tera Term and drivers for the UART USB
Step 3: To connect the USB UART to your node
Done.