This guide will help to configure remote control for a Dragino gateway.
- This is useful if we need to control the gateway in remote location or via 4G.
- Reference: https://www.remote.it/getting-started/dragino
Remote.It is supported on the following Dragino devices:
- Firmware version 5.4.1632916986 or higher
- Device models: LG01N, OLG01N (Note: LG01-P, LG01-S does not support), LG02, OLG02, LG308, DLOS8, LSP8, LIG16, MS14 series (If installed with the same firmware.)
- Mobile app: remote.it on iOS and Android
You will need:
- A Remote.It account. Sign up here: https://app.remote.it
- Login and access to the web UI of the Dragino via browser on the local network
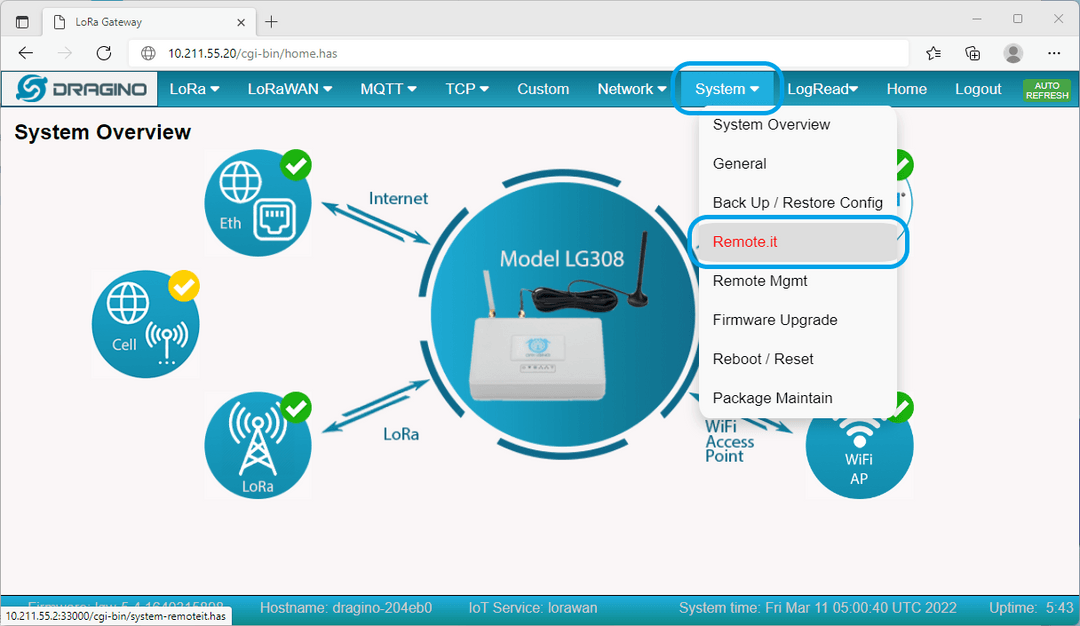
Step 1: Access the web UI of a Dragino device using a web browser on the local network. (When required to login, login as root.) Navigate to System>Remote.It.
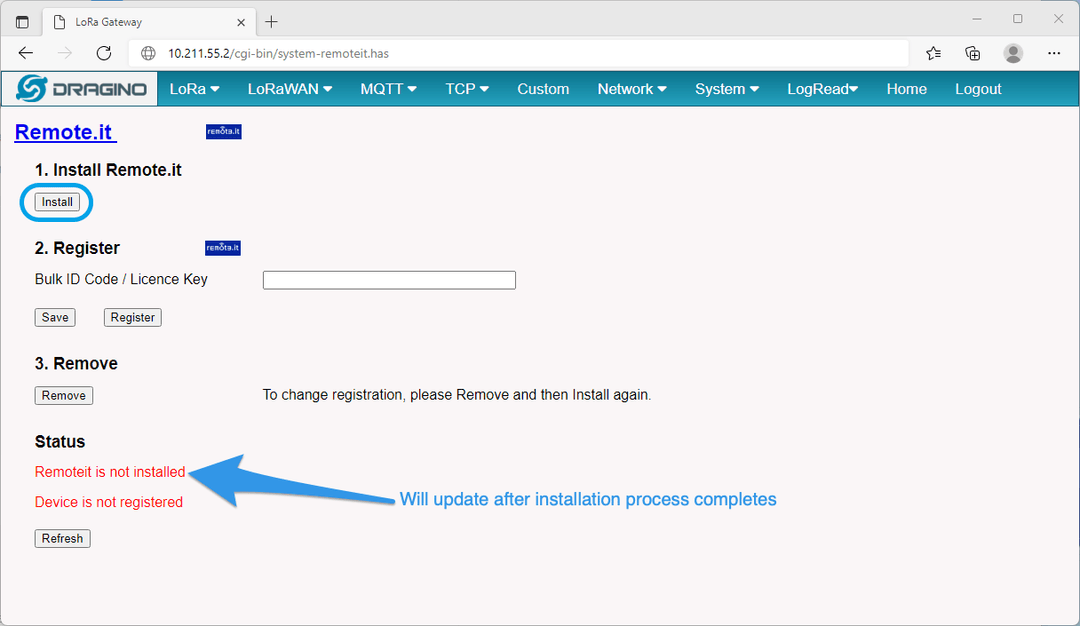
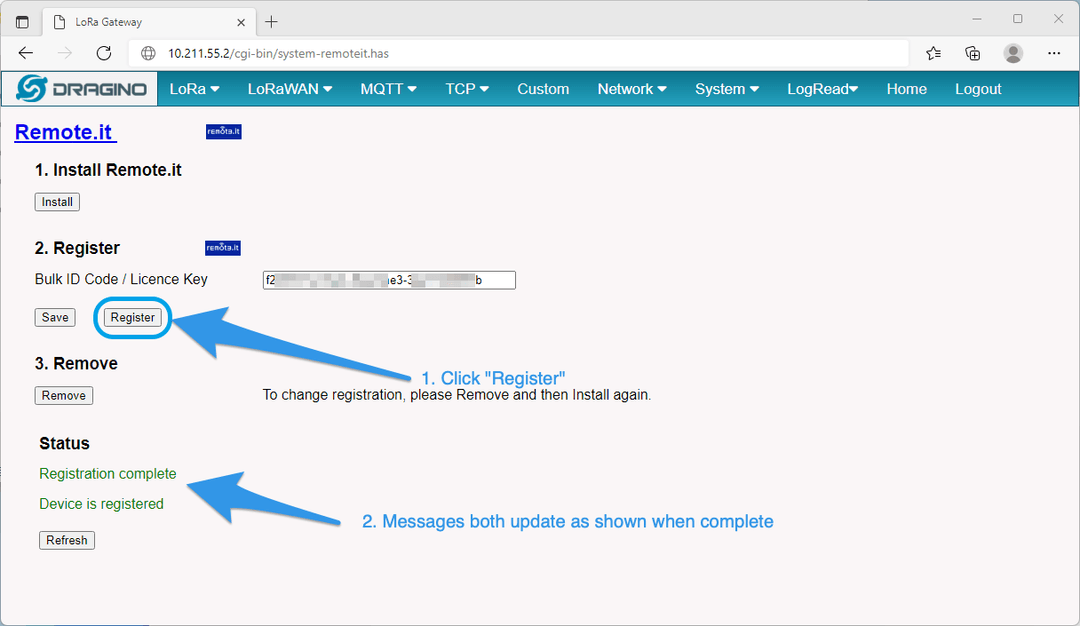
Step 2: Click the “Install” button on the Remote.it page. When finished, the Status section will update to show installation complete. You will need your Remote.It license key for this next step.
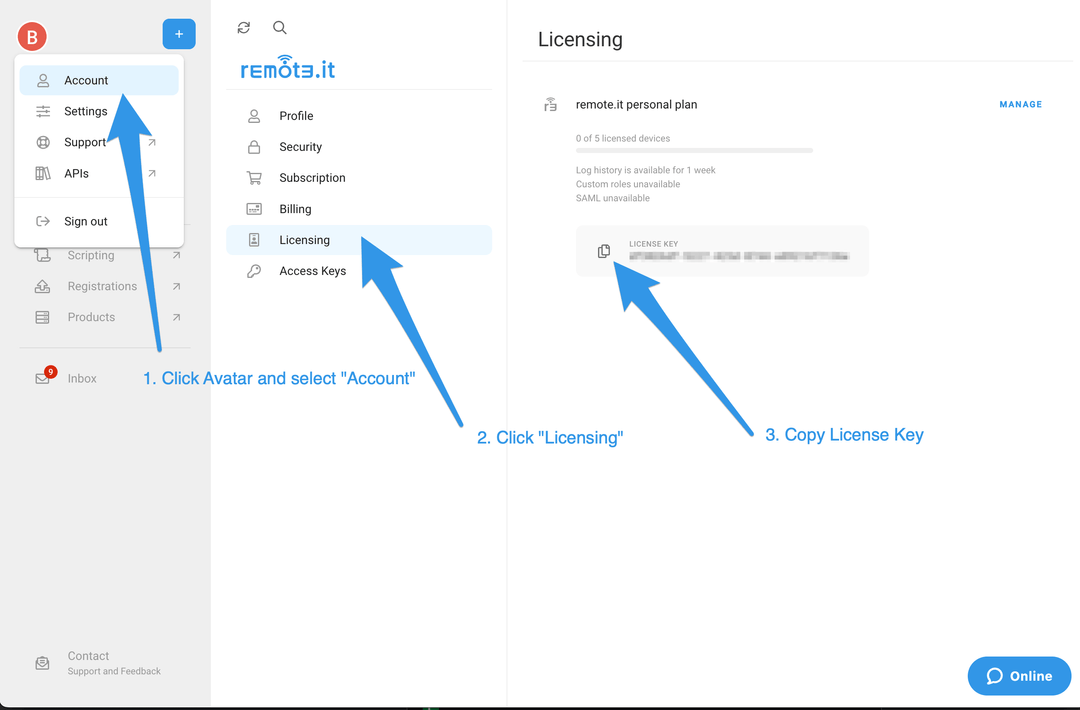
Step 3: Sign in to Remote.It https://app.remote.it and get your license key. Click on the avatar, then “Account” and then “Licensing”.
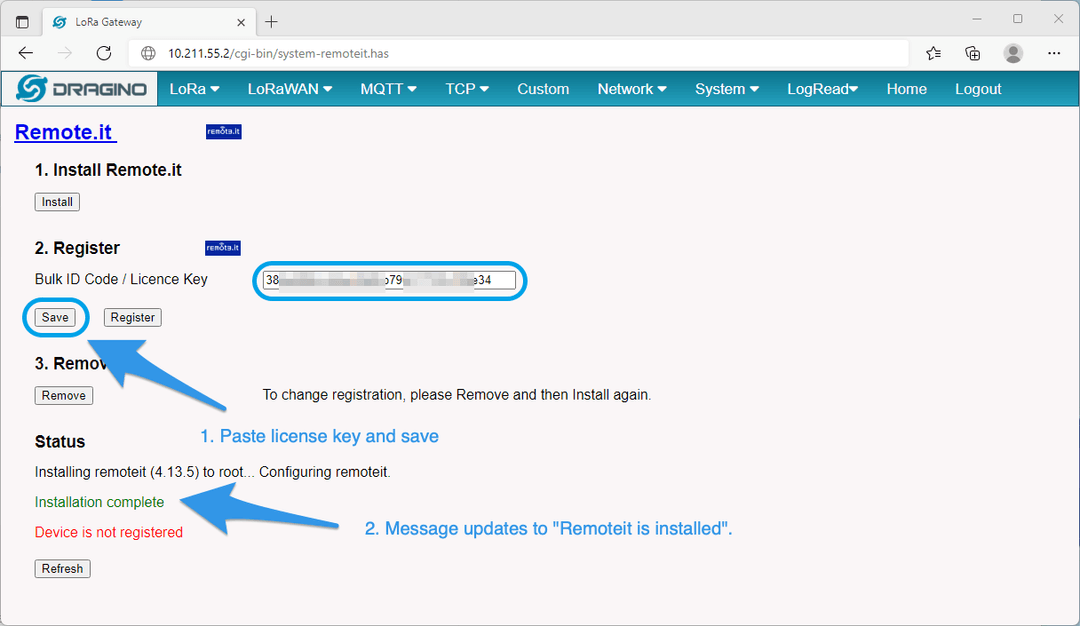
Step 4: Enter/paste the license key into the Dragino gateway page Bulk ID Code/License Key field and Save. The status message will update from “Installation complete” to “Remoteit is installed”.
Step 5: Click “Register”. Both status messages will update when complete.
Step 6: Go back to the Remote.It web portal and click devices. You may have to click the “refresh” icon to update the view (see image).
- Note: The device name in Remote.It is the hostname. You can see the hostname at the bottom of the Dragino gateway page.

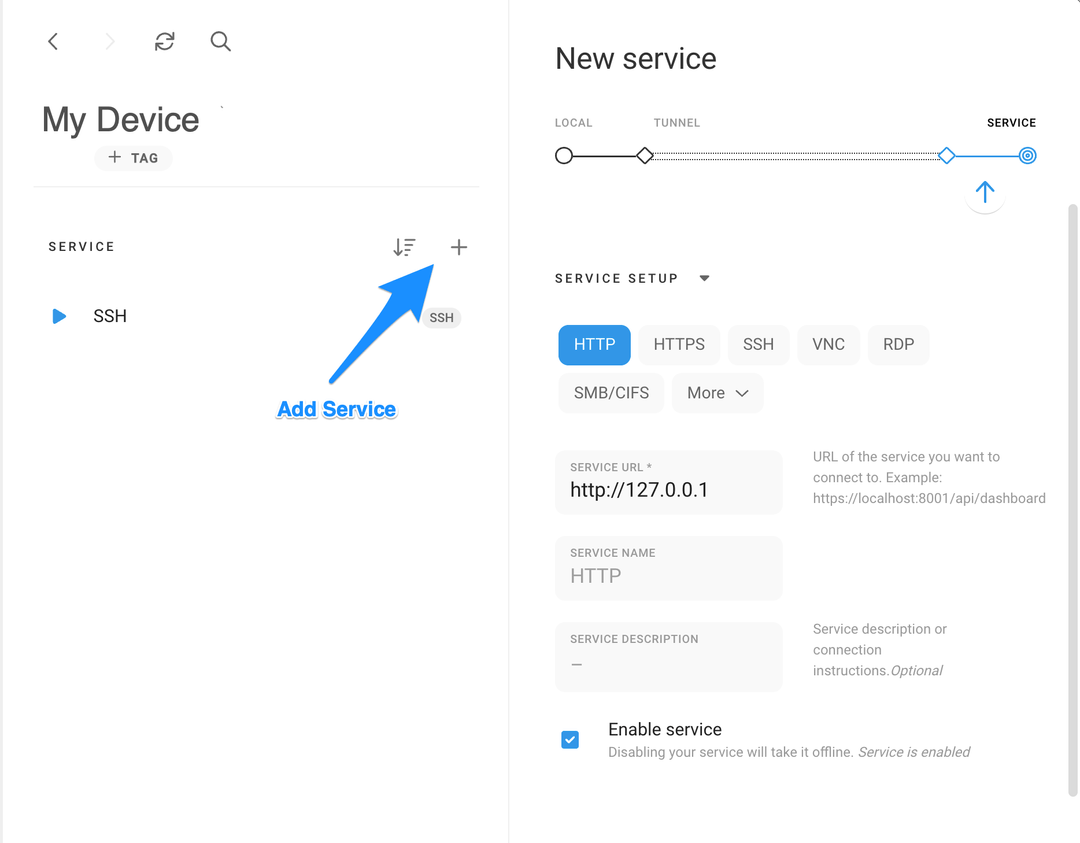
Step 7: Click on your Dragino device, click “+” (Add service) on the device detail.
- Provide a name, port, and service host address (Defaults are provided for most services). Only override default ports if you have assigned a different port for this service on your device.
- For example, you may want to allow Remote.It access to the Dragino gateway webpage. In this case, select HTTP.
- Repeat for all required services.
Step 8: Connect
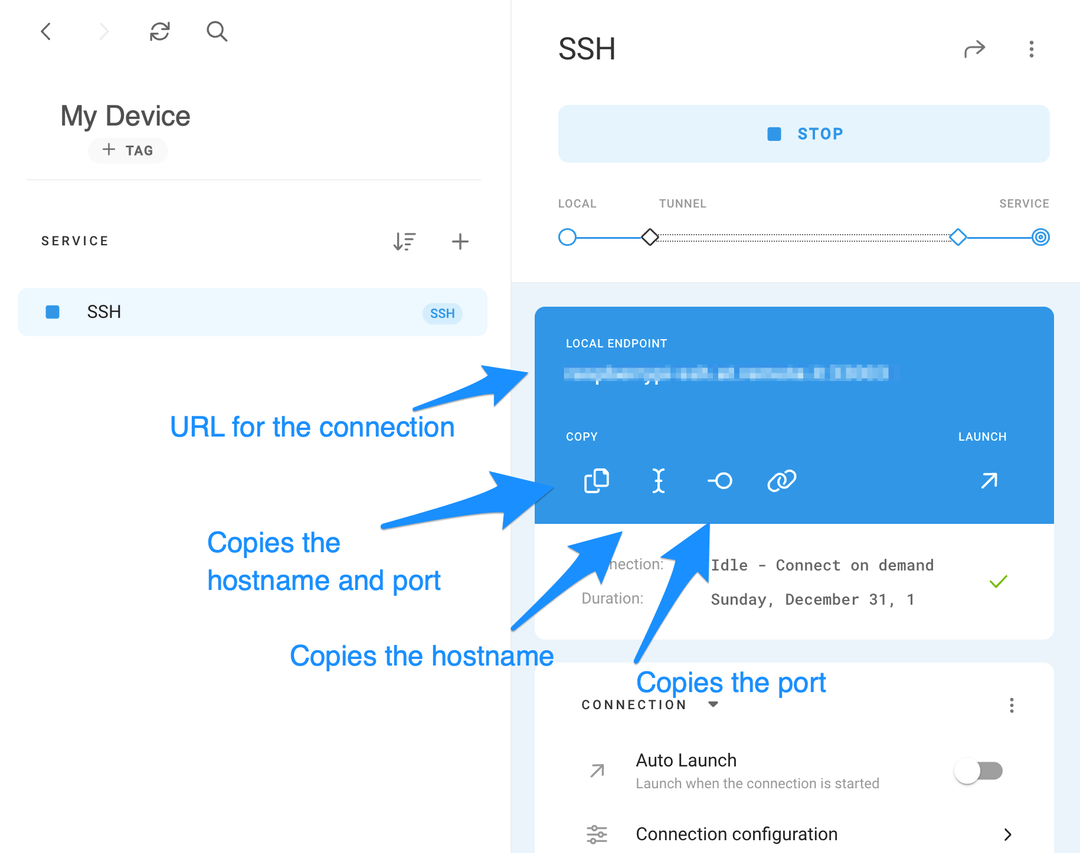
- Select the service you would like to create a Remote.It connection and click “Connect”.
- You can now use this connection address in an application such as terminal, VNC viewer or a browser.
- When you are done with the connection, click “Stop Connection”
Done.
Need help for your projects?
Please chat with us on the red chatbox to get help or discuss about your projects.
Thanks for reaching us.


Is this remote.it service free?
Yes, it is free for 5 gateways.
It is good to monitor and control your Dragino gateways in remote areas.
Yes, I have a LoRaWAN gateway in my warehouse.
And I’m thinking to have LoRaWAN server on cloud too.
Yes, then you can manage your LoRaWAN nodes remotely in the Easy LoRaWAN cloud.
And manage your LoRaWAN gateways remotely via remote.it too.